
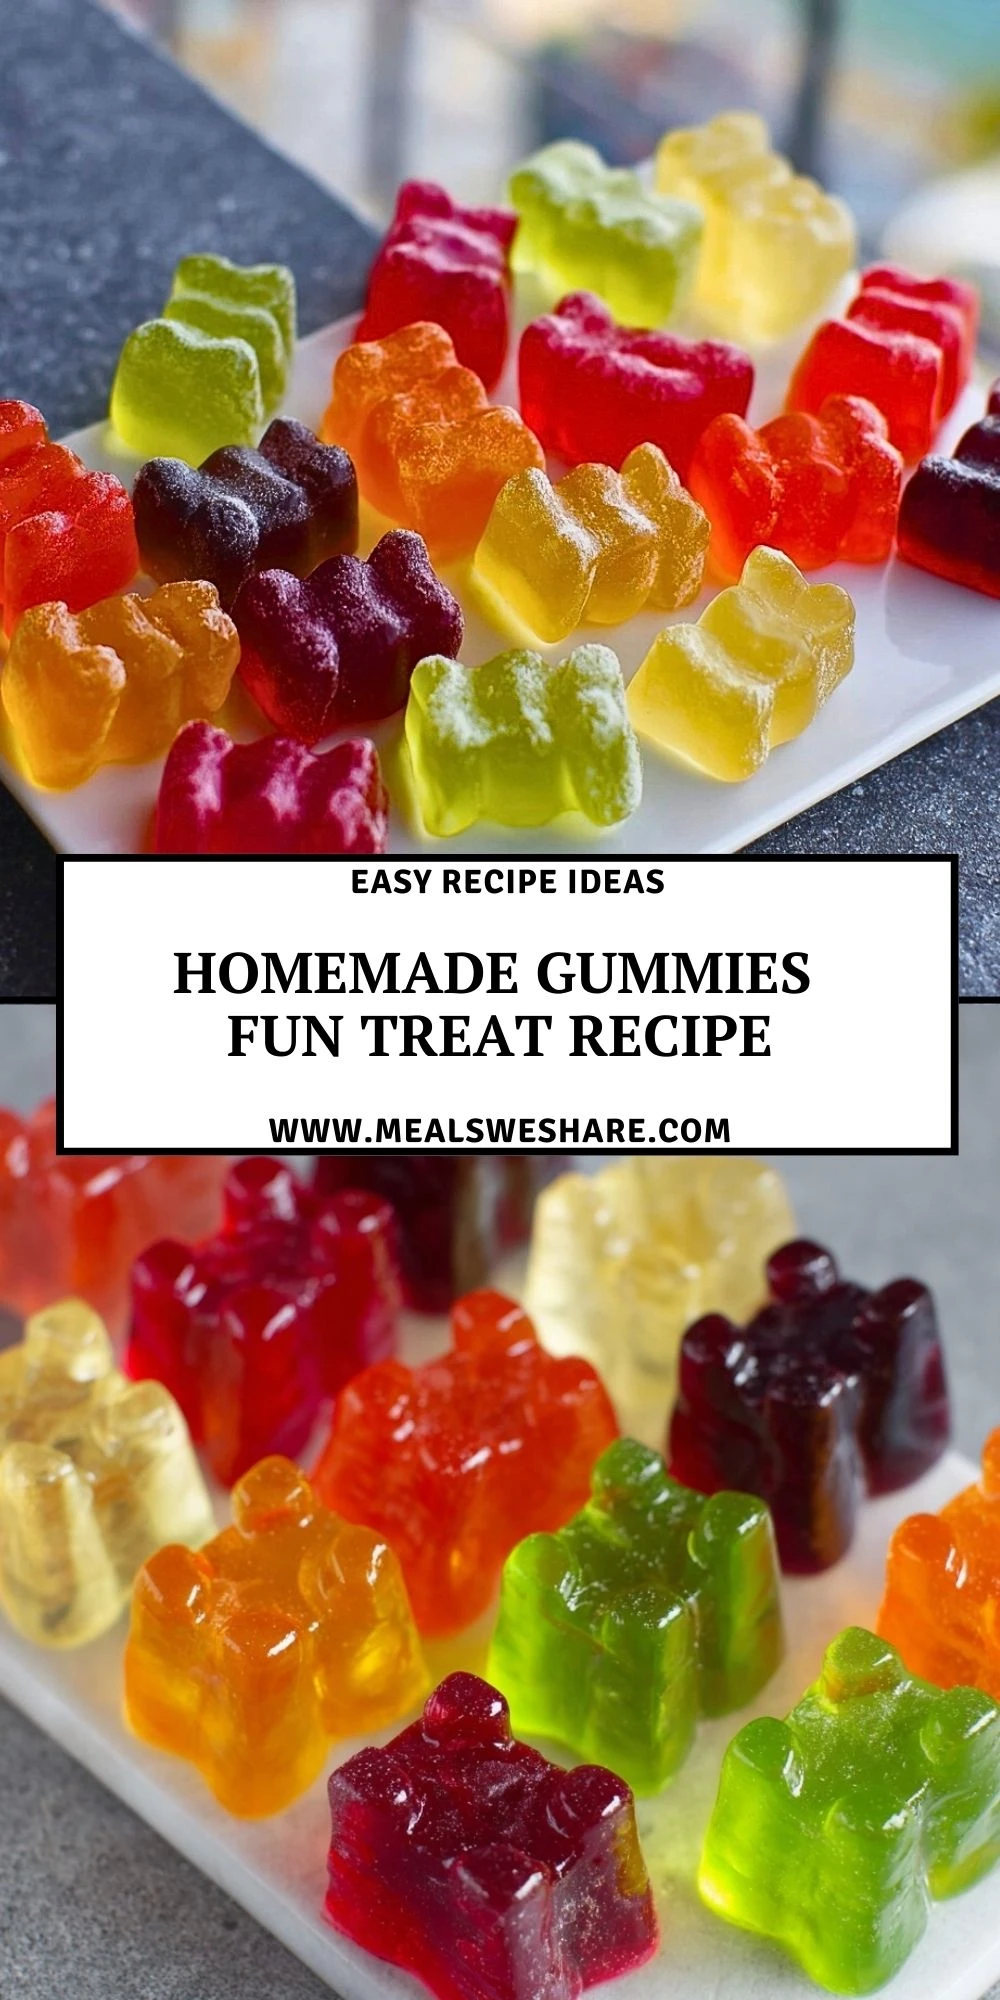
Colorful, chewy, and endlessly customizable, these Homemade Gummies are the kind of fun treat that makes kids (and grown‑ups) light up. Whether you pour them into classic bear molds or playful shapes for holidays and parties, they’re a simple little candy that looks like it came straight from a specialty shop.

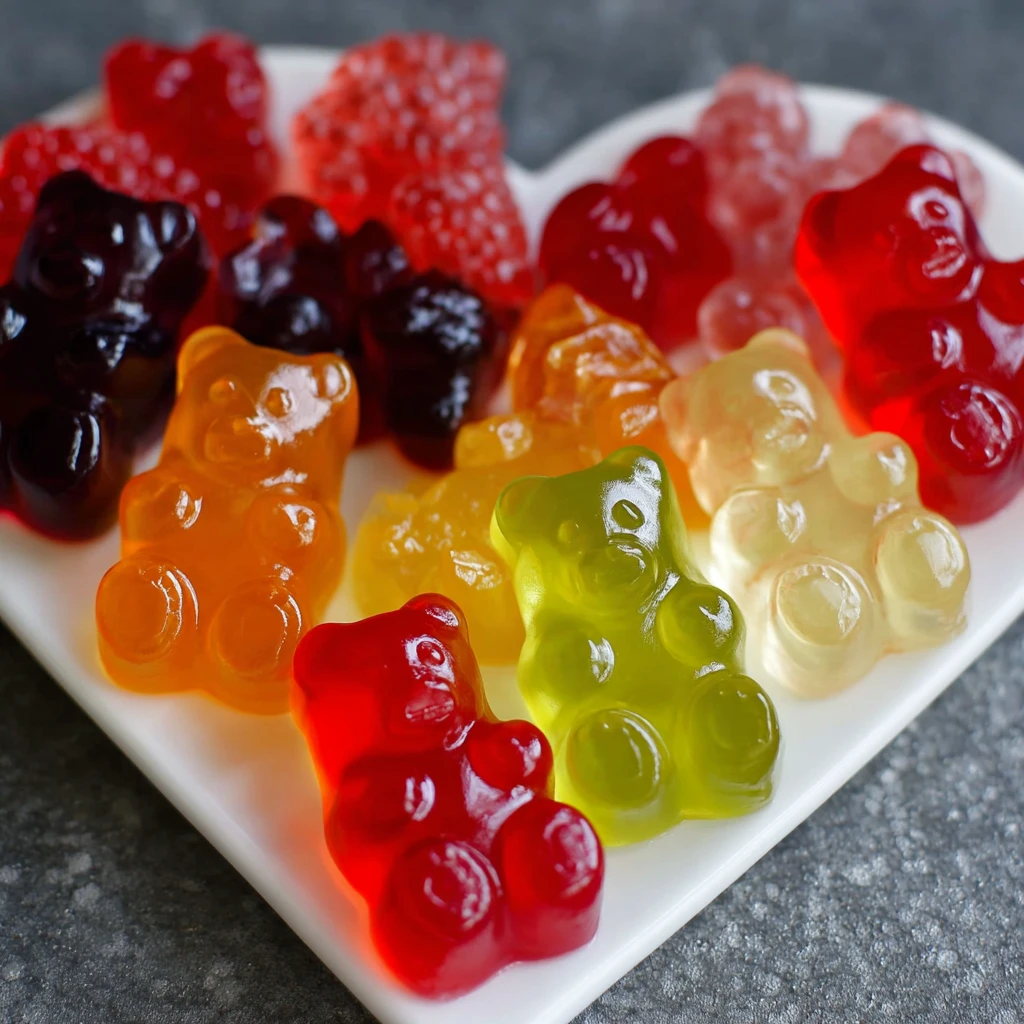
Unlike store‑bought gummies, you get to control everything here—flavors, sweetness, and even how soft or firm the texture is. Use your favorite real fruit juice, add a tangy hit of citrus, or stir in a bit of citric acid for that lip‑puckering sour finish. Once you make a batch, you’ll see just how easy it is to keep a jar of homemade gummies on hand for snacks, party favors, and lunchbox surprises.
Why You’ll Love This Homemade Gummies Fun Treat Recipe
This recipe is surprisingly quick and uses only a handful of pantry ingredients—fruit juice, unflavored gelatin, a touch of sugar or honey, and optional citric acid for a sour punch. No corn syrup, no artificial colors, and no mysterious ingredients you can’t pronounce.
It’s also incredibly versatile. You can make one big batch in a baking pan and cut it into cubes, or divide the mixture into several bowls to create a rainbow of flavors. Gummy bears, hearts, stars, worms—any silicone candy or ice cube mold you have at home will work.
Because the gummies are made with real juice, they’re a fun way to add a little fruit flavor to snack time. And if you have little helpers in the kitchen, this is the perfect project: they can help measure, stir, choose flavors, and pop the set gummies out of the molds.
What Kind of Juice and Flavorings Work Best for Homemade Gummies?
The beauty of homemade gummies is that almost any smooth, pulp‑free juice can work. Think grape, apple, white grape, cherry, cranberry, or a blend like tropical juice. Choose 100% juice for the best flavor, or use a lower‑sugar juice drink if you prefer a lighter option.
Citrus juice (like lemon, lime, or orange) adds brightness but can be a bit intense on its own, so it’s often best paired with something sweeter like apple or grape. A spoonful of lemon juice in the mix balances sweetness and gives the gummies a fresher, more candy‑shop flavor.
If you love sour candies, a pinch of citric acid is your secret weapon. Stir a tiny amount into the mixture or dust it over the finished gummies for a tangy finish. You can also add a drop or two of clear flavor extracts—like raspberry, strawberry, or orange—to boost the flavor without changing the color.
Ingredients for the Homemade Gummies Fun Treat Recipe
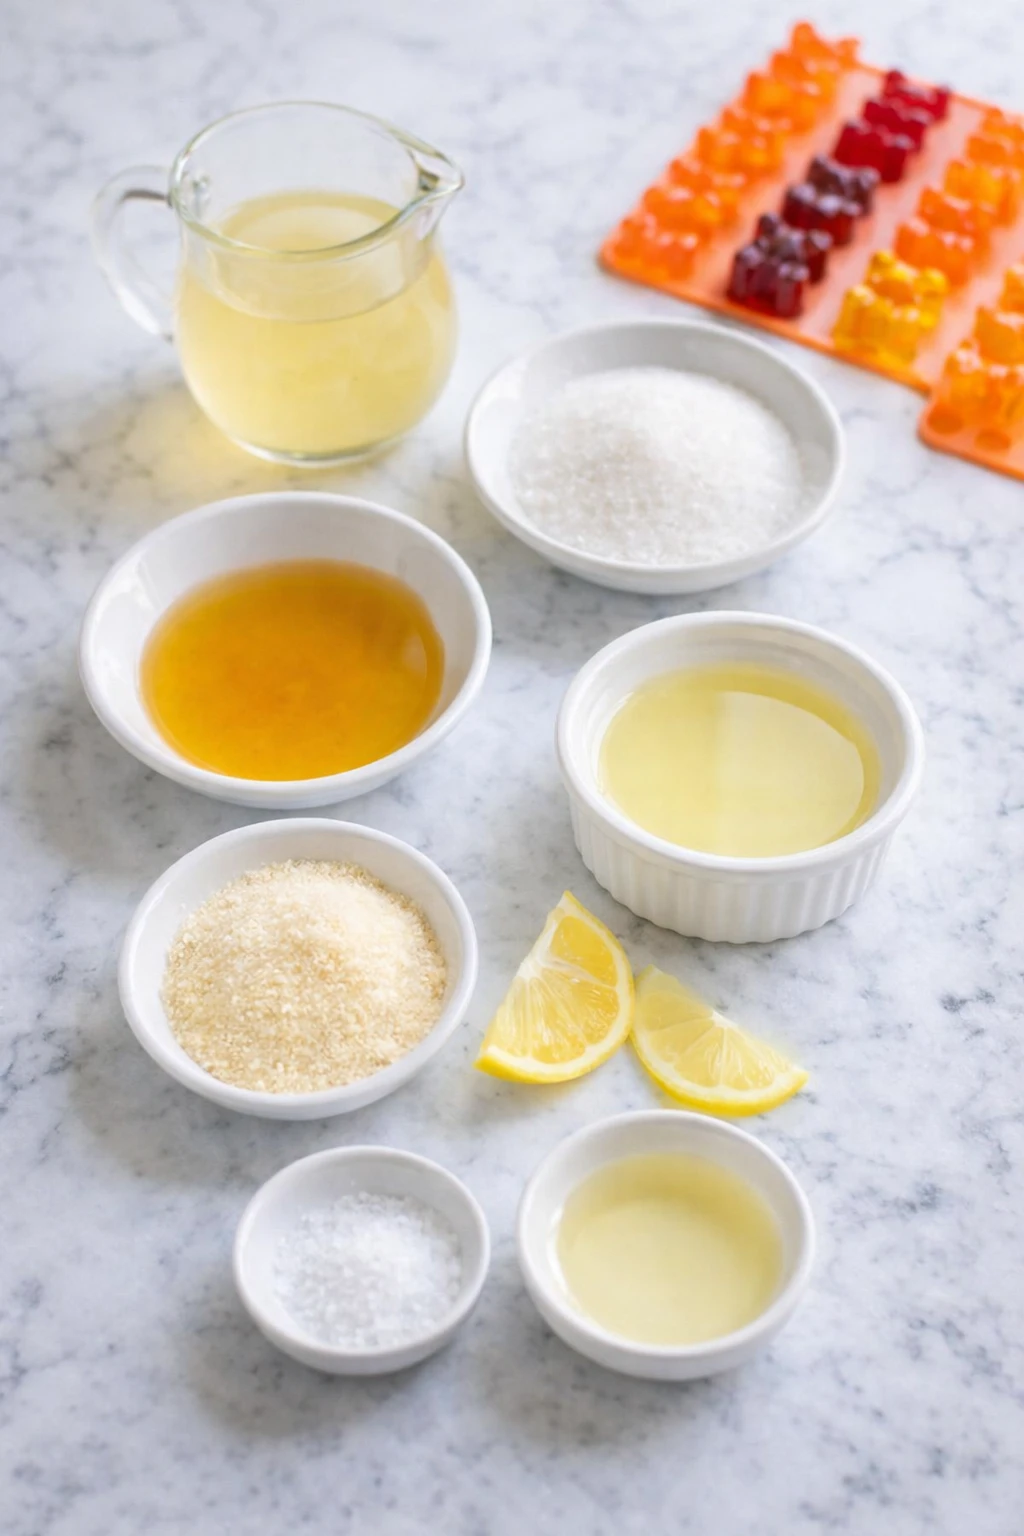
Before you start cooking, it’s helpful to set out all of your ingredients and molds so the process moves quickly. These basic ingredients create a chewy, shiny gummy texture that holds its shape beautifully.
- Fruit juice (100% juice, pulp‑free, any flavor)
- Granulated sugar or honey
- Unflavored gelatin powder
- Lemon juice
- Citric acid (optional, for sour gummies)
- Nonstick cooking spray or neutral oil (for greasing the molds)
Each ingredient plays a specific role: the juice provides flavor and color, the sugar or honey rounds out sweetness, and the gelatin is what gives gummies their signature bounce. A bit of lemon juice keeps the flavor bright, while citric acid makes them taste like your favorite sour candy. Lightly greasing the molds ensures the gummies pop out cleanly.
How To Make the Homemade Gummies Fun Treat Recipe
Making homemade gummies is a simple stovetop process. You’ll bloom the gelatin in cool juice, gently warm everything together, and then let the mixture set in molds until firm. Plan ahead for chill time—the active cooking is quick, but the gummies need at least an hour to set.
Step 1: Prep the Molds
Lightly spray your silicone gummy molds or a small baking dish with nonstick cooking spray, then gently wipe away any excess with a paper towel. You want a thin, even coating so the gummies release easily but don’t feel greasy.
Step 2: Bloom the Gelatin
Pour part of the cold fruit juice into a small saucepan. Sprinkle the unflavored gelatin evenly over the surface of the juice and let it sit for about 5 minutes. This “blooming” step allows the gelatin to fully hydrate so it melts smoothly without clumps.
Step 3: Warm the Mixture
Once the gelatin has bloomed, add the remaining juice, sugar or honey, and lemon juice to the saucepan. Place the pan over low heat and gently warm the mixture, stirring constantly, until the gelatin and sugar have completely dissolved. Do not let it boil—boiling can weaken the gelatin and make the gummies softer.
Step 4: Add Sourness (Optional)
If you like sour gummies, remove the pan from the heat and sprinkle in a small pinch of citric acid, whisking to dissolve. Taste carefully and add a little more if you want a punchier sour flavor, but go slowly—a tiny amount goes a long way.
Step 5: Pour Into Molds
Transfer the warm gummy mixture to a spouted measuring cup or pitcher to make pouring easier. Carefully fill your prepared gummy molds or pour the mixture into the prepared baking dish. If any bubbles rise to the surface, you can gently skim them off with a spoon.
Step 6: Chill Until Set
Place the molds on a tray for stability and transfer them to the refrigerator. Chill for at least 1 hour, or until the gummies are completely firm and spring back when gently pressed.
Step 7: Unmold and Enjoy
Once set, pop the gummies out of the molds or cut the slab into small cubes if you used a baking dish. Store the gummies in an airtight container and keep them chilled for the best texture.
Serving and Storing Your Homemade Gummies Fun Treat Recipe
A full batch of these homemade gummies will comfortably serve about 6 people, assuming a small handful (3–5 gummies) per person. They’re ideal for party snack tables, movie nights, holiday candy trays, or as a colorful surprise tucked into lunchboxes.
Serve them chilled for the chewiest texture. You can also toss them lightly with a bit of powdered sugar or cornstarch to keep them from sticking together if they’ll be sitting out on a dessert table for a while.
For storage, keep the gummies in an airtight container in the refrigerator for up to 7 days. Because they’re made with real juice and no preservatives, it’s best not to leave them at room temperature for extended periods, especially in warm weather. If they start to dry out a bit, you can revive them slightly by covering the container and letting them sit in the fridge overnight.
What to Serve With Homemade Gummies Fun Treat Recipe?
When you’re building a snack spread or dessert table, these chewy little gummies pair well with both fresh and baked treats. Mix and match textures so there’s something soft, crunchy, creamy, and fruity for everyone.
Fresh Fruit Platter
A big tray of sliced melon, grapes, berries, and pineapple looks beautiful next to a bowl of gummies and keeps the theme bright and colorful.
Popcorn or Pretzels
Salty snacks like popcorn or pretzels balance the sweetness of the gummies and make a fun movie‑night combo.
Vanilla or Fruit Yogurt Cups
Serve gummies alongside small yogurt cups or parfaits so guests can sprinkle a few on top for a playful garnish.
Simple Cupcakes or Brownies
Classic baked treats pair nicely with gummies on the side, or you can use a gummy or two as a fun topper.
Ice Cream Sundaes
Set up an ice cream bar and use the gummies as one of the toppings along with sprinkles, chocolate chips, and whipped cream.
Party Snack Board
Create a snack board with cheese cubes, nuts (if everyone can enjoy them), crackers, and your homemade gummies for a mix of sweet and savory bites.
Frequently Asked Questions
How firm will these homemade gummies be?
The gummies in this recipe are chewy and bouncy, similar to classic gummy bears. If you prefer a firmer, chewier texture, you can add an extra tablespoon of gelatin to the mixture. For a softer, more jelly‑like gummy, reduce the gelatin slightly.
Can I make these gummies without added sugar?
Yes. If your juice is already sweet enough for your taste, you can skip the added sugar or honey. Keep in mind that sugar not only sweetens the gummies but also helps keep the texture tender, so gummies made without sugar may firm up a bit more.
Can I use multiple flavors in one batch?
Definitely. Prepare the base gummy mixture, then divide it into separate bowls and stir a different juice concentrate or flavor extract into each portion before pouring into molds. For a dessert table full of colorful bites, you might pair these gummies with vibrant treats like Rainbow Sprinkle Cake Pops or Rainbow Ombre Drip Layer Cake.
How do I stop the gummies from sticking together?
Make sure the gummies are fully chilled and firm before you remove them from the molds. Once they’re out, you can toss them lightly in a small amount of powdered sugar or cornstarch, then shake off any excess. This creates a delicate coating that keeps them from sticking without affecting the flavor.
Can I make these ahead for a party?
Homemade gummies are perfect for make‑ahead treats. You can prepare them 2–3 days before your event and store them in an airtight container in the refrigerator. For a party dessert spread, consider serving them alongside other bite‑sized sweets like No‑Bake Mini Cheesecakes or colorful Rainbow Smoothie Bowls.
Save This Pin For Later
📌 Save this Homemade Gummies Fun Treat Recipe to your Pinterest dessert board so you can come back to it any time.
Once you’ve tried it, let me know how your gummies turned out. Did you make them sour with citric acid or keep them simply sweet? Did you stick with one flavor or mix and match a rainbow of juices?
I love hearing how others make these recipes their own. Questions are welcome too—let’s help each other make snack time and dessert tables even more fun.
Conclusion
Homemade gummies are one of those recipes that look impressive but take just a few minutes of hands‑on time. With basic pantry ingredients and your favorite juice, you can create bright, chewy candies tailored exactly to your family’s taste.
They’re perfect for birthdays, holidays, movie nights, and lunchbox treats, and they pair beautifully with other fun desserts like Peanut Butter M&M’s Cookies or no‑bake cheesecake jars.
If you’re ready for more colorful sweets, easy dessert ideas, and party‑worthy snack inspiration, you’ll find plenty of them over on Pinterest at Meals We Share.
Print Homemade Gummies Fun Treat Recipe
- Total Time: 1 hour 20 minutes
- Yield: 24 small gummies
- Diet: Gluten Free
Description
These Homemade Gummies are a fun treat made with real fruit juice, perfect for a quick breakfast add-on, healthy snack, or colorful dessert on your list of easy recipe and food ideas. They’re soft, chewy, and full of fruity flavor, and you can customize each batch with different juices for parties, lunchboxes, or family movie nights. Keep this recipe in your back pocket for those moments when you need simple snack or breakfast ideas, kid-friendly dinner ideas, or a make-ahead sweet that feels special without any fuss.
Ingredients
1 cup fruit juice (100% juice, pulp free, any flavor)
2 tablespoons granulated sugar or honey
3 tablespoons unflavored gelatin powder
1 tablespoon lemon juice
1/8 teaspoon citric acid (optional, for sour gummies)
1 teaspoon neutral oil or nonstick cooking spray (for greasing molds)
Instructions
1. Lightly grease your silicone gummy molds or a small baking dish with neutral oil or nonstick cooking spray, wiping away any excess so there is only a thin, even coating.
2. Pour 1/2 cup of the cold fruit juice into a small saucepan and sprinkle the unflavored gelatin evenly over the surface. Let it sit undisturbed for 5 minutes so the gelatin can bloom and fully hydrate.
3. Add the remaining 1/2 cup fruit juice, the granulated sugar or honey, and the lemon juice to the saucepan with the bloomed gelatin.
4. Place the pan over low heat and cook, stirring constantly, until the sugar and gelatin have completely dissolved and the mixture looks smooth and glossy, 3 to 5 minutes. Do not let the mixture boil.
5. Remove the pan from the heat and, if desired, stir in the citric acid a pinch at a time, tasting carefully until the gummies are as sour as you like.
6. Transfer the warm gummy mixture to a heat-safe measuring cup or small pitcher with a spout to make pouring easier.
7. Carefully pour the mixture into the prepared gummy molds, or pour it into the greased baking dish to make gummy cubes. Skim off any bubbles on the surface with a spoon.
8. Place the filled molds or baking dish on a tray and transfer to the refrigerator. Chill for at least 1 hour, or until the gummies are completely firm and springy when gently pressed.
9. Once set, pop the gummies out of the molds, or cut the slab into small cubes if you used a baking dish.
10. Store the gummies in an airtight container in the refrigerator for up to 7 days, serving them chilled for the best chewy texture.
Notes
For firmer, chewier gummies similar to store-bought candy, add an extra 1 tablespoon of gelatin to the mixture.
To keep the gummies from sticking together, lightly toss the finished candies in a small amount of powdered sugar or cornstarch, then shake off the excess before storing.
Use different juices in separate batches—such as grape, apple, and berry—to create a colorful assortment of homemade gummies for parties or gift bags.
- Prep Time: 15 minutes
- Cook Time: 5 minutes
- Category: Dessert, Snack
- Method: Stovetop
- Cuisine: American
Nutrition
- Serving Size: 4 gummies
- Calories: 45
- Sugar: 7
- Sodium: 5
- Fat: 0
- Saturated Fat: 0
- Unsaturated Fat: 0
- Trans Fat: 0
- Carbohydrates: 9
- Fiber: 0
- Protein: 2
- Cholesterol: 0
Keywords: homemade gummies, gummy bears, fun treat, kids snack, party food, quick breakfast, healthy snack, breakfast ideas, dinner ideas, easy recipe, food ideas