 Sally Roberts
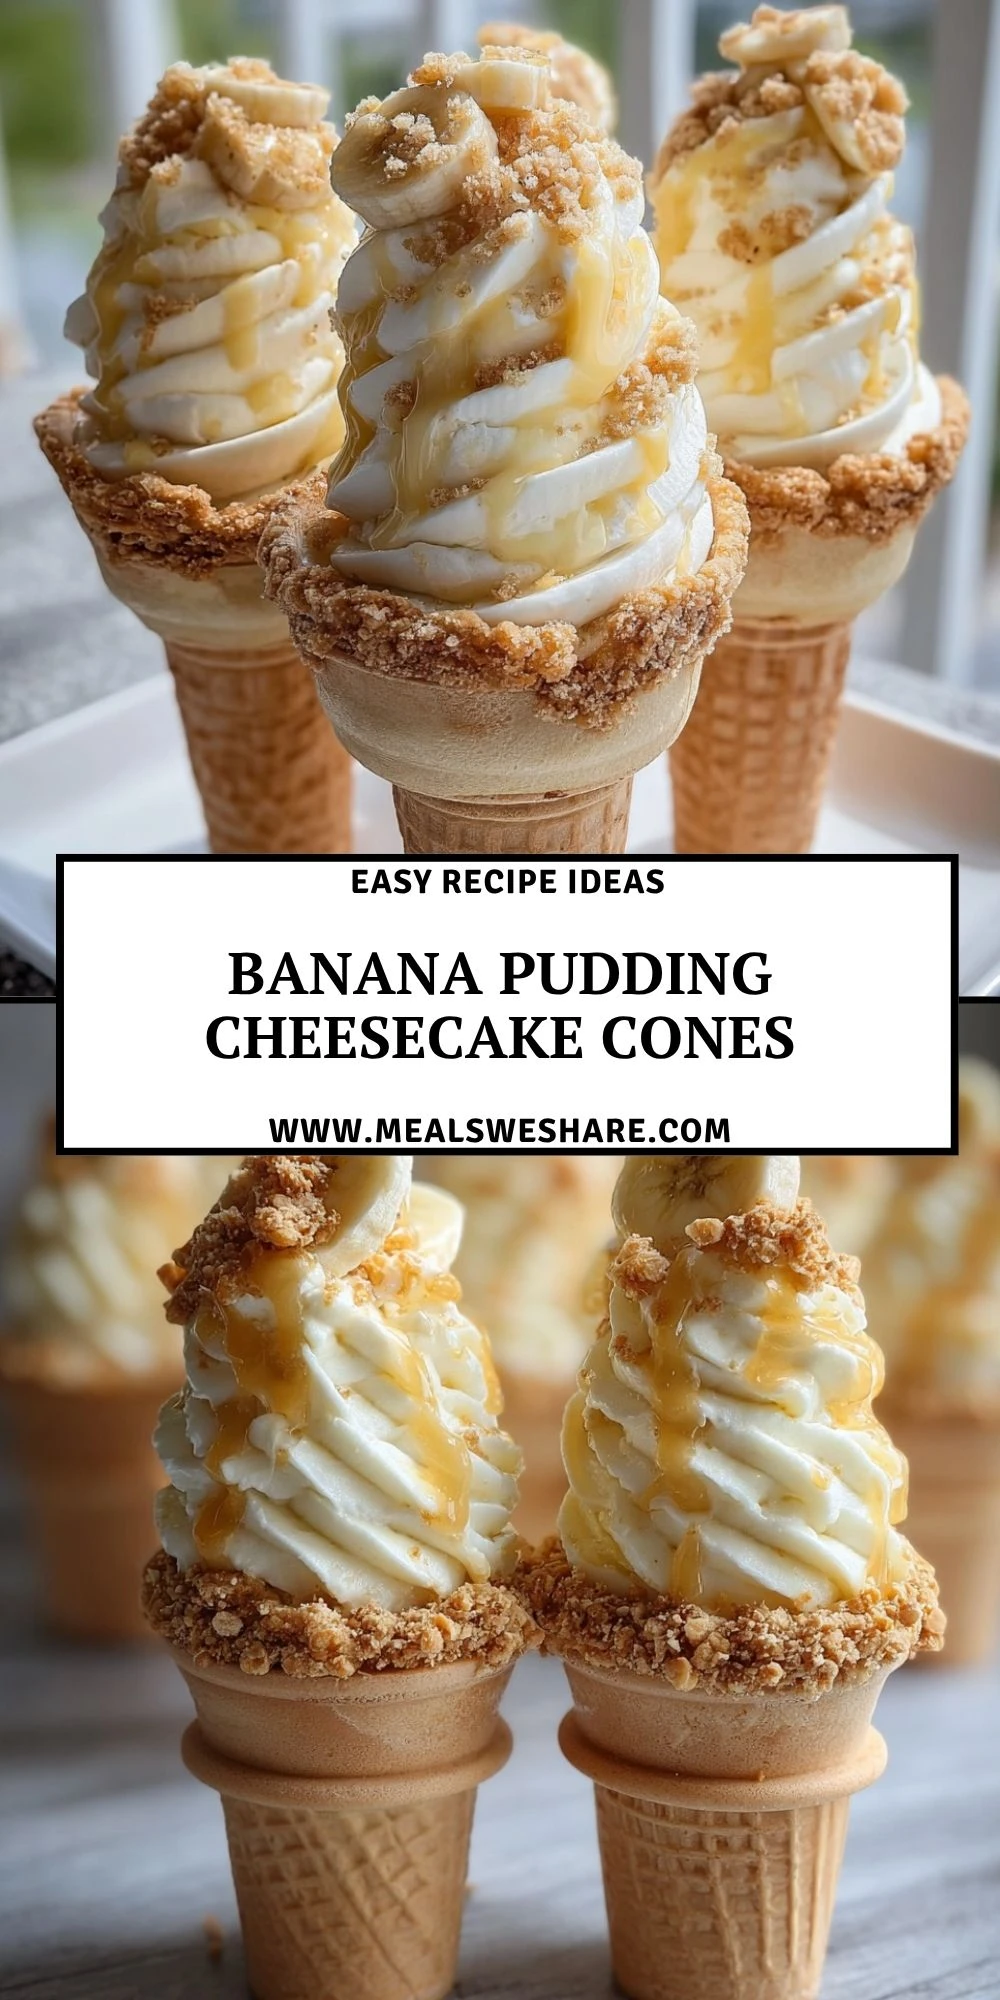
Banana Pudding Cheesecake Cones are the kind of dessert that looks playful, tastes nostalgic, and feels special enough for a party tray. Each cone is filled with creamy banana cheesecake pudding, tucked with fresh banana slices, finished with whipped topping, vanilla wafer crumbs, and a glossy caramel-style drizzle.

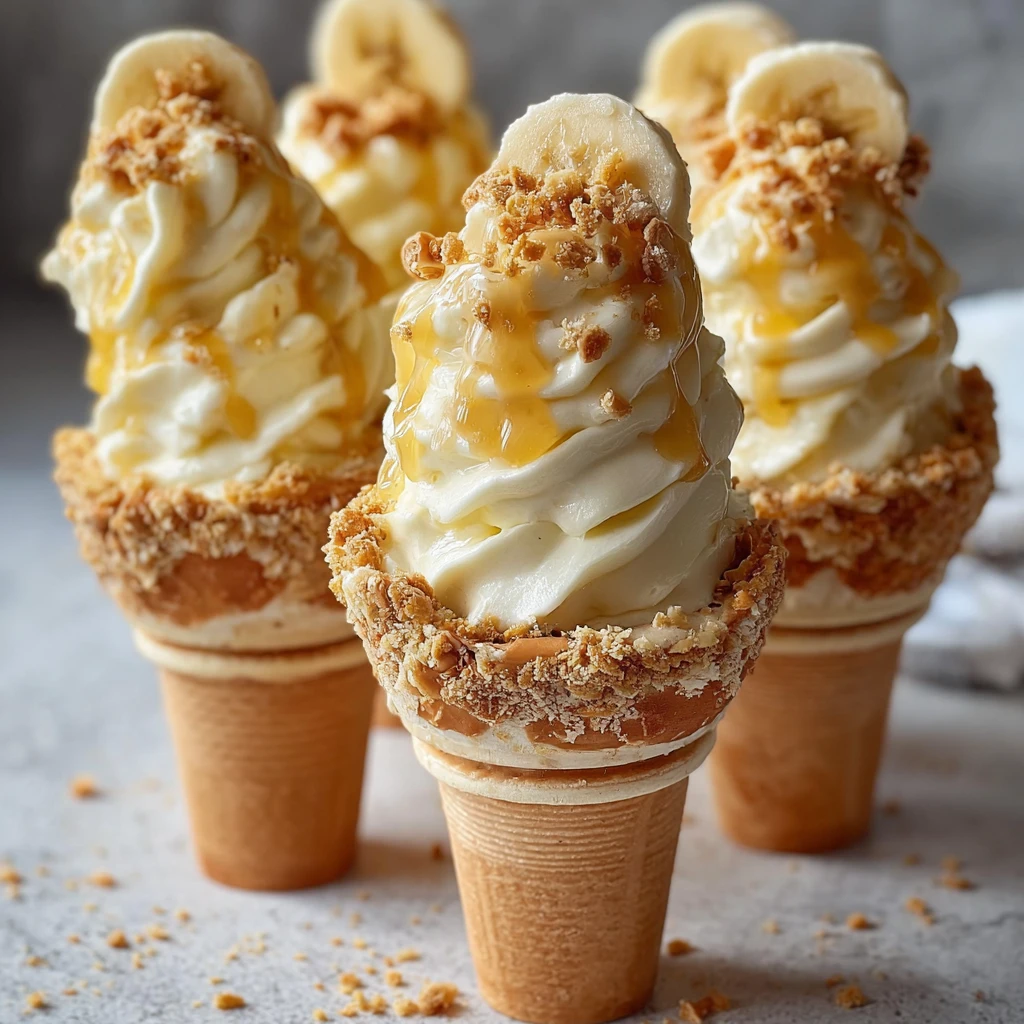
This is a no-bake dessert idea that brings together the comfort of banana pudding and the richness of cheesecake in a handheld waffle cone. It is sweet, creamy, crunchy, and easy to serve without slicing, scooping, or fussing with plates.
Why You’ll Love This Banana Pudding Cheesecake Cones
These cones are fun, creamy, and made for anyone who loves banana pudding but wants a fresh way to serve it. The waffle cone gives every bite a crisp bakery-style crunch, while the cheesecake filling adds that thick, velvety texture people expect from a richer dessert.
They also work beautifully for birthdays, cookouts, dessert tables, family weekends, and casual gatherings. You can make the filling ahead, prep the toppings, and assemble the cones right before serving so they stay crisp and picture-perfect.
What Makes Banana Pudding Cheesecake Cones So Creamy?
The creaminess comes from a mix of softened cream cheese, instant banana pudding, milk, and whipped topping. The cream cheese gives the filling body and a gentle tang, while the pudding adds banana flavor and helps the mixture set without baking.
Whipped topping lightens the texture so the cones do not feel too heavy. Once chilled, the filling becomes smooth enough to pipe but thick enough to hold its tall swirl inside each cone.
Ingredients for the Banana Pudding Cheesecake Cones
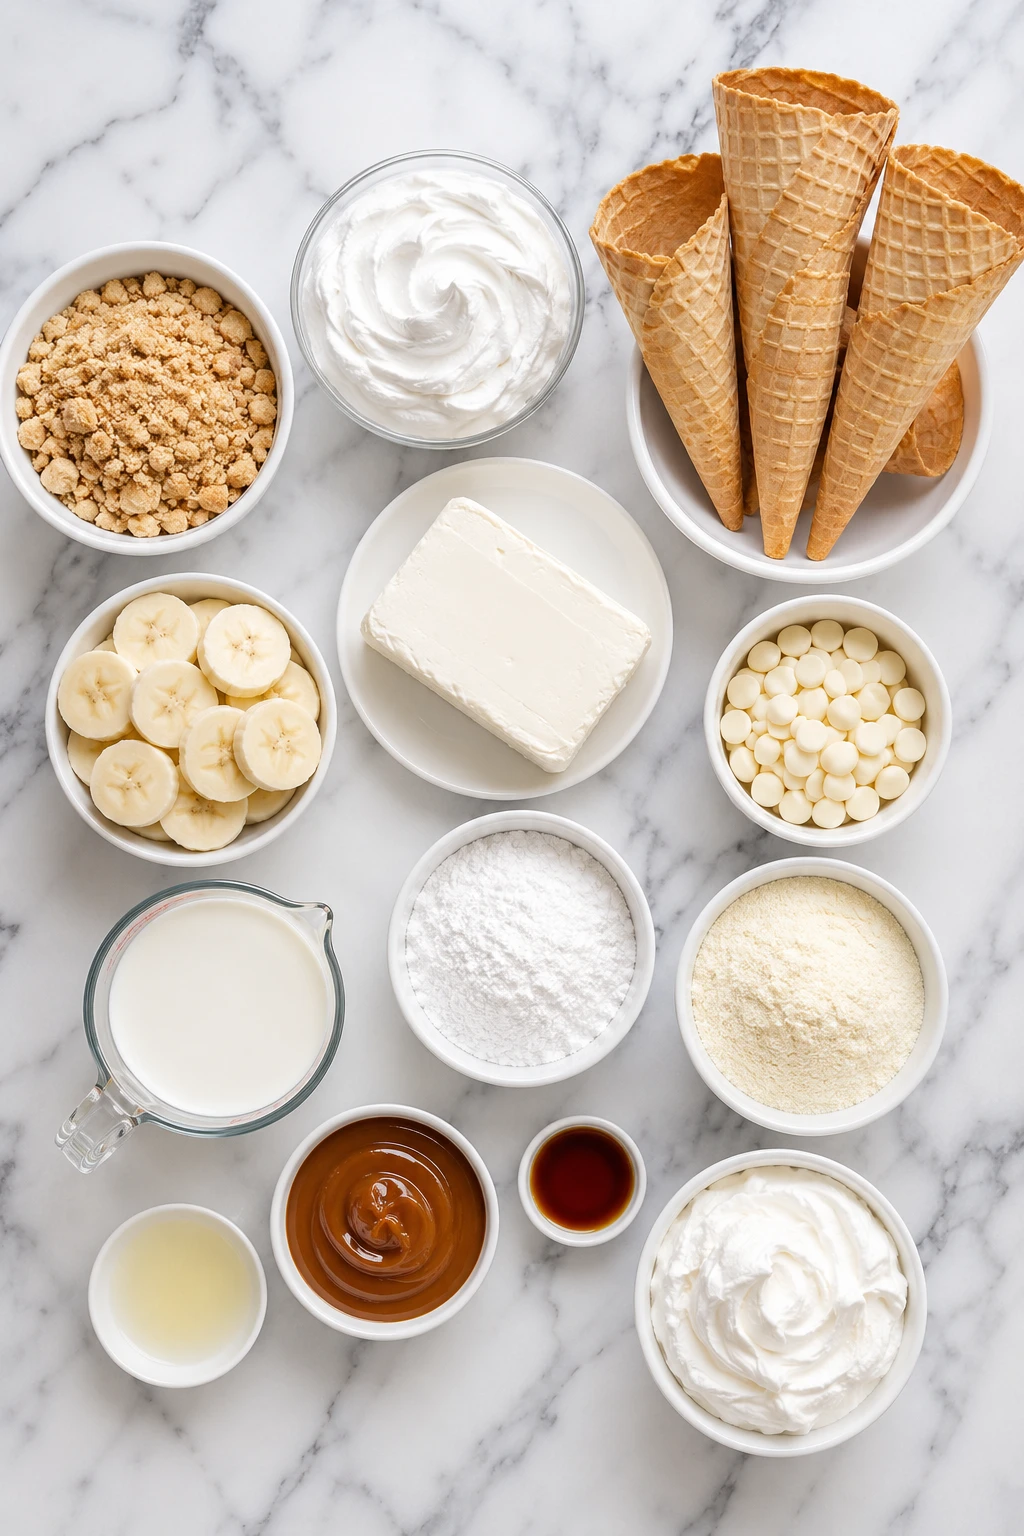
Every ingredient helps build the creamy, crunchy, banana-packed layers that make these cones taste like banana pudding and cheesecake in one bite.
Vanilla wafer crumbs add the classic banana pudding flavor and a crumbly texture around the cone rim and on top.
Waffle cones hold the filling and give the dessert its crisp handheld base.
White chocolate or vanilla candy melts help coat the rim so the crumbs stick and also create a light barrier that keeps the cone crisp longer.
Cream cheese gives the filling a cheesecake-style richness and a thick, smooth texture.
Instant banana pudding mix brings banana flavor and helps the filling set quickly.
Cold milk activates the pudding mix and loosens the cream cheese into a creamy filling.
Powdered sugar sweetens the cheesecake mixture without making it grainy.
Vanilla extract deepens the flavor and rounds out the sweetness.
Whipped topping makes the filling lighter, fluffier, and easier to pipe.
Fresh bananas bring real fruit flavor and soft banana slices in every cone.
Lemon juice helps slow browning on the banana slices.
Caramel sauce or sweetened condensed milk drizzle adds a glossy finish and extra sweetness.
Extra whipped cream creates the tall bakery-style swirl on top.
How To Make the Banana Pudding Cheesecake Cones
This dessert is easiest when you chill the filling first, prep the cones next, and assemble everything shortly before serving.
Step 1: Prepare the Crumb-Coated Cones
Melt the white chocolate or vanilla candy melts in a microwave-safe bowl in short bursts, stirring until smooth. Dip the rim of each waffle cone into the melted coating, then immediately roll the rim in vanilla wafer crumbs. Set the cones upright in a cup, cone holder, or muffin tin until the coating firms.
Step 2: Make the Banana Cheesecake Filling
Beat the softened cream cheese in a large bowl until smooth and creamy. Add the powdered sugar and vanilla extract, then mix again until the base looks silky. In a separate bowl, whisk the banana pudding mix with cold milk until thickened. Add the pudding to the cream cheese mixture and beat until fully combined.
Step 3: Fold in the Whipped Topping
Add the whipped topping to the banana cheesecake mixture and gently fold it in with a spatula. Keep folding until the filling looks light, fluffy, and evenly blended. Cover the bowl and chill for at least 30 minutes so the filling becomes easier to pipe.
Step 4: Slice the Bananas
Slice the bananas just before assembling. Toss the slices gently with a little lemon juice to help keep them fresh-looking. Pat them lightly with a paper towel if they seem too wet, since extra moisture can soften the cones.
Step 5: Fill the Cones
Spoon or pipe a little banana cheesecake filling into the bottom of each cone. Add a few banana slices, then continue filling until the cone is full. Press banana slices around the inside edge if you want that pretty banana-pudding-cone look.
Step 6: Add the Tall Swirl
Pipe more banana cheesecake filling or whipped cream on top in a tall swirl. Use a star piping tip for a bakery-style finish, or spoon it on softly for a casual homemade look.
Step 7: Finish With Crumbs and Drizzle
Sprinkle extra vanilla wafer crumbs over the top. Drizzle with caramel sauce or sweetened condensed milk right before serving. Serve immediately for the crispiest cones.
Serving and Storing Banana Pudding Cheesecake Cones
Banana Pudding Cheesecake Cones are best served shortly after assembling because waffle cones naturally soften once filled. This batch makes 8 cones, which feeds about 8 people as a single dessert serving. For a party table with other sweets, you can also serve them as a shareable dessert option alongside small cups or mini treats.
To make them ahead, prepare the filling up to 24 hours in advance and keep it covered in the refrigerator. You can also coat the cone rims with chocolate and crumbs a few hours ahead. Wait to add banana slices, filling, whipped topping, crumbs, and drizzle until close to serving time.
If you have leftovers, place them upright in a covered container and refrigerate for up to 1 day. The flavor will still be delicious, but the cones will lose some crunch.
What to Serve With Banana Pudding Cheesecake Cones?
Fresh Strawberries
Strawberries add a bright, juicy contrast to the creamy banana filling. Serve them on the side or tuck a few sliced berries into the cones with the bananas for a fruity twist.
Iced Coffee
A cold glass of iced coffee balances the sweetness and makes these cones feel like a café-style dessert. The slight bitterness of coffee pairs especially well with the cheesecake filling and caramel drizzle.
Vanilla Milkshakes
For a playful dessert spread, serve these cones with small vanilla milkshakes. It creates a fun banana-cream dessert moment without needing a complicated menu.
Chocolate Drizzle
Chocolate sauce is a great extra topping for guests who love banana and chocolate together. Set it out beside the caramel drizzle so everyone can finish their cone the way they like.
Frequently Asked Questions
Can I make Banana Pudding Cheesecake Cones ahead of time?
You can make the filling ahead, but it is best not to fully assemble the cones too early. The cheesecake pudding filling can be refrigerated for up to 24 hours, and the crumb-coated cones can be prepped several hours ahead. Assemble the cones right before serving so the waffle cones stay crisp.
How do I keep the cones from getting soggy?
Coating the rim with melted white chocolate helps, but you can also brush a thin layer inside the cone if you want more protection. Let the coating set completely before adding the filling. Also, avoid wet banana slices and do not add the drizzle until the end.
Can I use homemade whipped cream instead of whipped topping?
Yes, homemade whipped cream works well. Whip 1 cup heavy cream with 2 tablespoons powdered sugar until medium peaks form, then fold it into the filling. The texture may be slightly softer than whipped topping, so chilling the filling is important before piping.
Can I use vanilla pudding instead of banana pudding?
Yes, vanilla pudding makes a softer banana flavor and lets the fresh banana slices stand out more. For a richer dessert-table option, you might also enjoy pairing these cones with No-Bake Mini Cheesecakes because both desserts share that creamy cheesecake-style texture.
What toppings can I add?
Crushed vanilla wafers, caramel drizzle, chocolate sauce, sliced strawberries, toasted coconut, chopped pecans, or mini chocolate chips all work nicely. For more creamy dessert inspiration, browse treats like Tiramisu Cups or a classic Tres Leches Cake when planning a larger dessert table.
Save This Pin For Later
📌 Save this Banana Pudding Cheesecake Cones idea to your Pinterest dessert board so you can come back to it any time.
Let me know in the comments how yours turned out. Did you use caramel drizzle or sweetened condensed milk? Did you keep the cones simple or add chocolate on top?
I love hearing how others make these desserts their own. Questions are welcome too, let’s help each other make sweeter, easier treats at home. For more daily dessert ideas and food inspiration, follow Meals We Share.
Conclusion
Banana Pudding Cheesecake Cones are creamy, crunchy, and easy to love. They take the familiar flavor of banana pudding and turn it into a fun handheld dessert that feels festive without needing the oven.
Keep the filling chilled, assemble the cones close to serving time, and finish with plenty of crumbs and drizzle. The result is a sweet, impressive dessert that looks bakery-ready but comes together with simple ingredients.
Print Banana Pudding Cheesecake Cones
- Total Time: 55 minutes
- Yield: 8 cones
- Diet: Vegetarian
Description
Banana Pudding Cheesecake Cones are a fun no-bake dessert filled with creamy banana cheesecake pudding, fresh banana slices, vanilla wafer crumbs, whipped topping, and a sweet drizzle. This easy recipe is perfect for party desserts, summer food ideas, quick dessert ideas, birthday treats, and simple make-ahead desserts when you want something creamy, crunchy, and crowd-pleasing.
Ingredients
8 waffle cones
1 cup vanilla wafer crumbs
1 cup white chocolate or vanilla candy melts
8 ounces cream cheese, softened
1 box instant banana pudding mix, 3.4 ounces
1 1/2 cups cold milk
1/2 cup powdered sugar
1 teaspoon vanilla extract
2 cups whipped topping, thawed
3 ripe bananas, sliced
1 tablespoon lemon juice
1/3 cup caramel sauce or sweetened condensed milk
1 cup whipped cream, for topping
Instructions
1. Melt the white chocolate or vanilla candy melts in short microwave bursts, stirring until smooth.
2. Dip each waffle cone rim into the melted coating, then roll the rim in vanilla wafer crumbs. Let the cones set upright.
3. Beat the softened cream cheese until smooth, then mix in powdered sugar and vanilla extract.
4. In a separate bowl, whisk the banana pudding mix with cold milk until thickened.
5. Beat the pudding mixture into the cream cheese mixture until creamy and smooth.
6. Fold in the whipped topping until the filling is light and fluffy.
7. Chill the filling for 30 minutes so it thickens for piping.
8. Toss banana slices gently with lemon juice to help slow browning.
9. Pipe or spoon filling into each cone, layering in banana slices as you go.
10. Add whipped cream or extra banana cheesecake filling on top.
11. Sprinkle with vanilla wafer crumbs and drizzle with caramel sauce or sweetened condensed milk.
12. Serve immediately for the crispiest texture.
Notes
Chill the filling before piping so it holds a tall swirl and does not slide down the cone.
Assemble the cones right before serving because waffle cones soften once they are filled.
For extra crunch protection, brush a thin layer of melted white chocolate inside each cone and let it set before adding the filling.
- Prep Time: 25 minutes
- Cook Time: 0 minutes
- Category: Dessert
- Method: No-Bake
- Cuisine: American
Nutrition
- Serving Size: 1 cone
- Calories: 385
- Sugar: 33g
- Sodium: 240mg
- Fat: 19g
- Saturated Fat: 12g
- Unsaturated Fat: 6g
- Trans Fat: 0g
- Carbohydrates: 50g
- Fiber: 2g
- Protein: 5g
- Cholesterol: 38mg
Keywords: Banana Pudding Cheesecake Cones, no-bake dessert, easy recipe, quick dessert ideas, party desserts, banana pudding dessert, cheesecake cones, summer food ideas