
Christmas Chocolate Caramel Cups are the kind of holiday treat that looks bakery-worthy but stays wonderfully simple. Each little cup has a crisp chocolate shell, a soft caramel center, and a festive sprinkle topping that makes it feel ready for cookie trays, Christmas parties, edible gifts, and cozy movie nights.

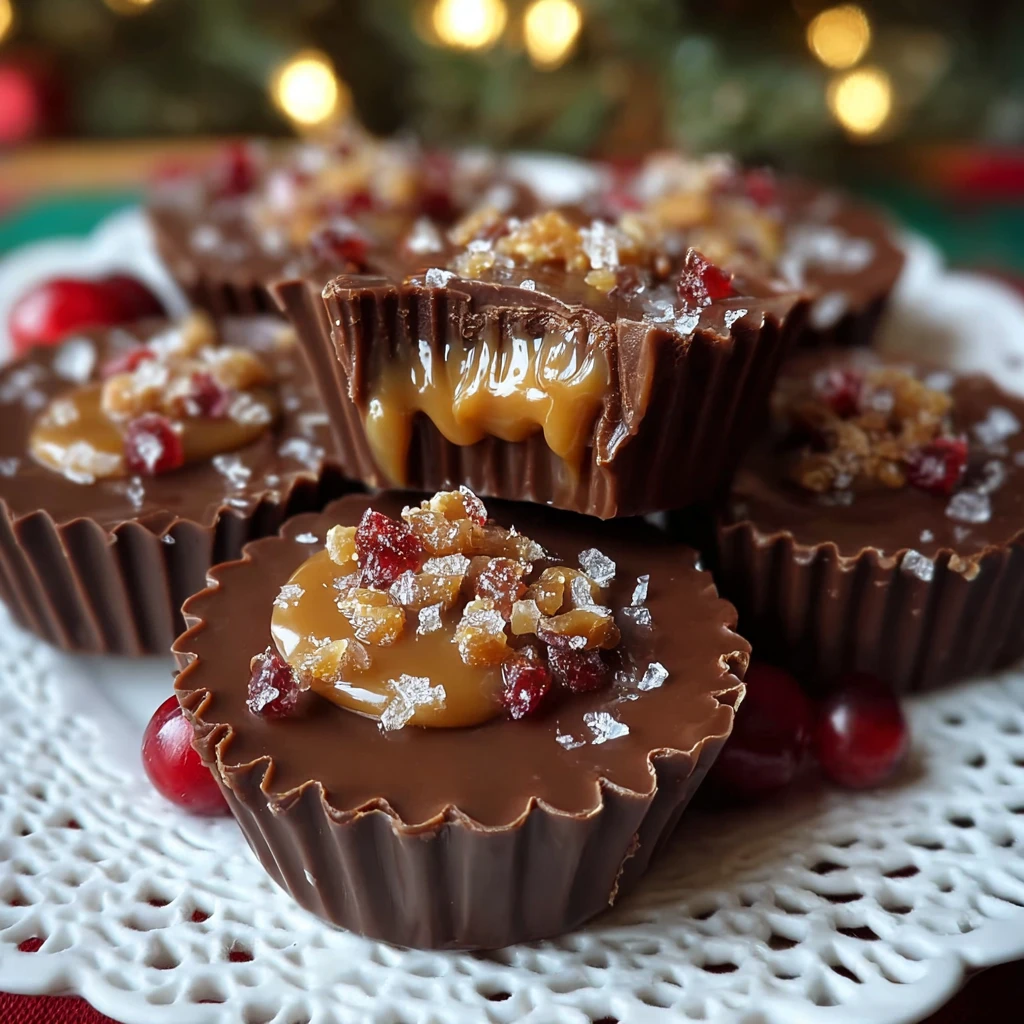
The best part is the contrast: smooth chocolate, buttery caramel, and a little sparkle from holiday sprinkles or coarse sugar. They are bite-sized, easy to share, and just rich enough that one or two feel like a special seasonal dessert.
Why You’ll Love This Christmas Chocolate Caramel Cups
These Christmas Chocolate Caramel Cups are made with simple ingredients, but they feel extra festive because of the glossy chocolate coating and cheerful red, green, and white decorations. You can make them ahead, keep them chilled, and pull them out whenever guests stop by.
They are also flexible. Use milk chocolate for a sweeter candy, dark chocolate for a deeper flavor, or semi-sweet chocolate for a balanced bite. The caramel center stays soft and creamy, while the chocolate sets into a neat little shell that makes each cup easy to pick up and serve.
What Kind of Chocolate Should I Use for Christmas Chocolate Caramel Cups?
Good melting chocolate makes a big difference here. Chocolate chips work, but chopped baking chocolate or chocolate melting wafers usually melt smoother and set with a cleaner finish. Semi-sweet chocolate is a reliable choice because it balances the sweetness of the caramel.
Milk chocolate gives these cups a classic candy-shop flavor, while dark chocolate makes them taste more grown-up and less sweet. White chocolate can also be drizzled over the top for contrast, but it is best used as decoration rather than the main shell because caramel pairs beautifully with a stronger chocolate base.
Ingredients for the Christmas Chocolate Caramel Cups
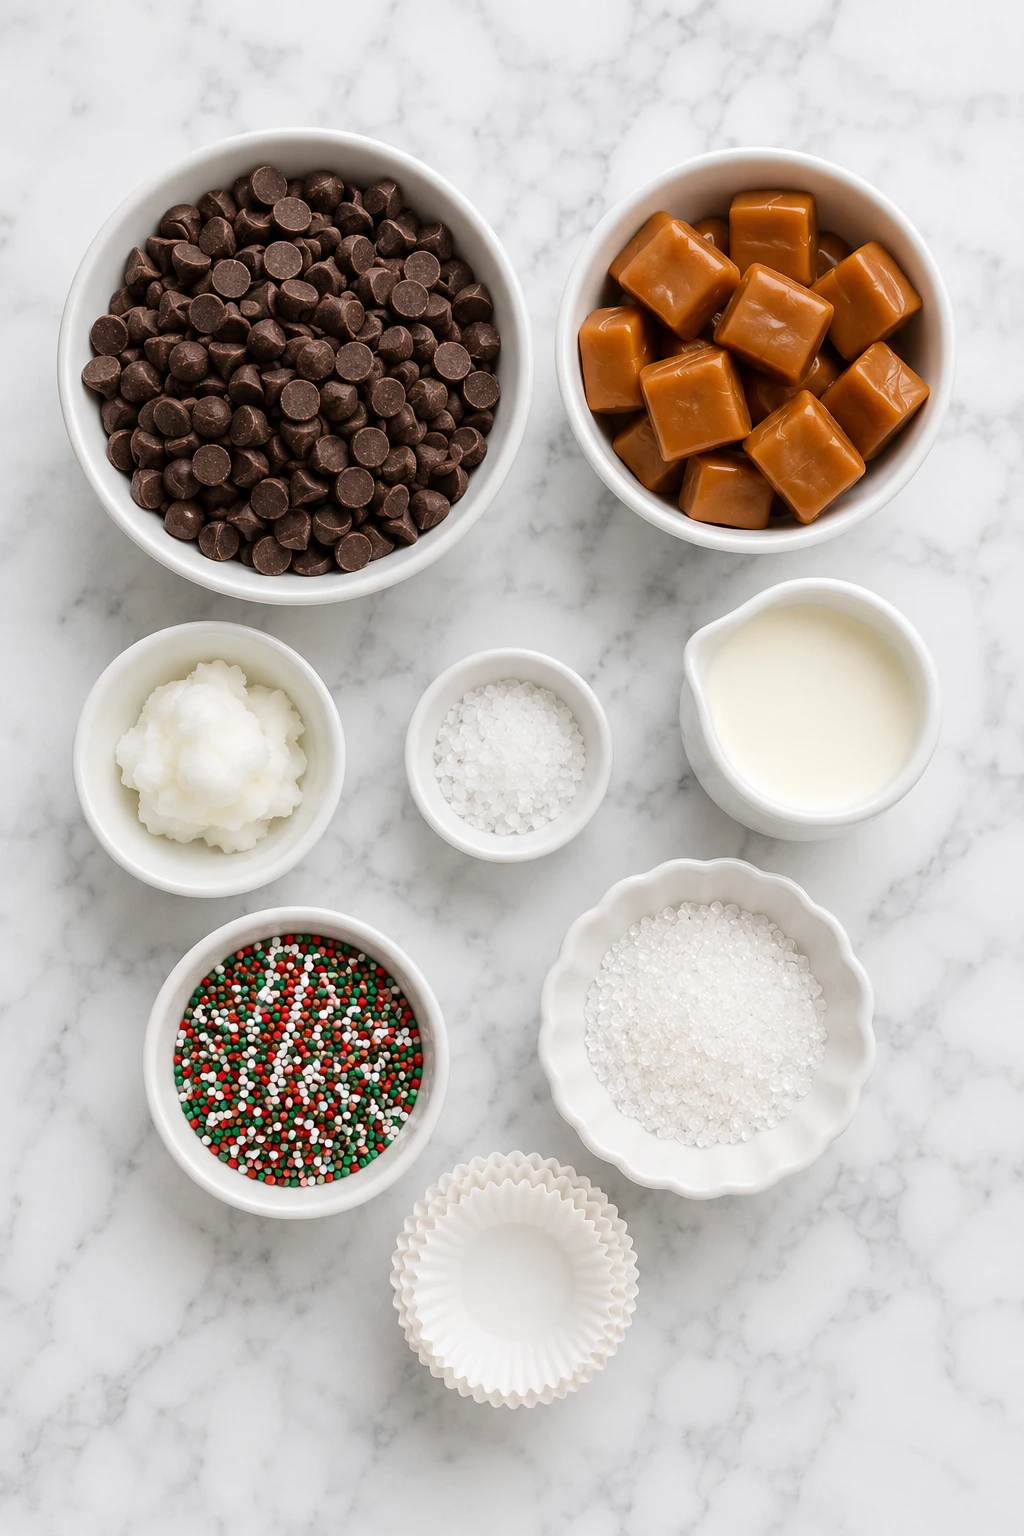
These ingredients create a simple homemade candy with a firm chocolate shell, a gooey caramel middle, and a festive topping. Choose good-quality chocolate and soft caramels for the best texture.
Semi-sweet chocolate gives the cups structure, shine, and a rich cocoa flavor that balances the sweet caramel.
Coconut oil or shortening helps the chocolate melt smoothly and gives the finished cups a cleaner bite.
Soft caramel candies create the gooey center without needing to make caramel from scratch.
Heavy cream loosens the caramel so it becomes smooth, pourable, and soft after chilling.
Fine sea salt sharpens the caramel flavor and keeps the cups from tasting overly sweet.
Holiday sprinkles add color and make the cups feel ready for Christmas dessert trays.
Coarse sugar or sparkling sugar gives the tops a frosty holiday look and a light crunch.
Mini paper candy liners help shape the cups and make them easy to remove and serve.
How To Make the Christmas Chocolate Caramel Cups
This method builds the cups in layers, so the caramel stays tucked neatly inside the chocolate. Chill each layer briefly before moving to the next step for the cleanest finish.
Step 1: Prepare the Candy Liners
Line a mini muffin pan with mini paper candy liners. This helps the cups hold their shape while the chocolate sets. Make sure the liners are fully open and sitting evenly in the pan.
Step 2: Melt the Chocolate
Place the chocolate and coconut oil in a microwave-safe bowl. Heat in 20-second bursts, stirring well between each one, until the chocolate is smooth. Avoid overheating because chocolate can seize or become grainy.
Step 3: Make the Bottom Chocolate Layer
Spoon a small amount of melted chocolate into each liner. Use the back of a spoon to gently push the chocolate slightly up the sides, creating a thin shell. Chill for 10 minutes, or until the chocolate firms up.
Step 4: Melt the Caramel Filling
Add the soft caramels and heavy cream to a small saucepan over low heat. Stir constantly until the caramel melts into a smooth sauce. Remove from the heat and stir in the sea salt. Let it cool for a few minutes so it is warm but not hot.
Step 5: Fill the Cups
Spoon a small amount of caramel into each chocolate shell. Keep the caramel centered and avoid overfilling, so there is room for the top chocolate layer. Chill for 10 minutes to help the caramel settle.
Step 6: Seal With Chocolate
Spoon more melted chocolate over the caramel and spread it gently to cover the filling completely. Tap the pan lightly on the counter to smooth the tops and release any air bubbles.
Step 7: Add the Festive Topping
Before the chocolate sets, sprinkle each cup with holiday sprinkles and coarse sugar. Add a tiny pinch of flaky salt too, if you love salted caramel flavor.
Step 8: Chill Until Set
Refrigerate the cups for 20 to 30 minutes, or until firm. Once set, remove them from the pan and store them chilled or at cool room temperature.
Serving and Storing Christmas Chocolate Caramel Cups
Christmas Chocolate Caramel Cups are perfect for dessert boards, cookie trays, candy boxes, school parties, office treats, and holiday movie nights. This batch makes about 24 mini cups, which feeds 12 people if you plan on 2 cups per person.
Serve them slightly chilled for the neatest bite. If they sit in a warm room for too long, the caramel may soften, so place them on the dessert table shortly before serving.
Store the cups in an airtight container in the refrigerator for up to 1 week. Separate layers with parchment paper so the tops stay pretty. You can also freeze them for up to 2 months; thaw in the refrigerator before serving.
What to Serve With Christmas Chocolate Caramel Cups?
Hot Cocoa
A warm mug of cocoa makes these candy cups feel even more festive. The chocolate-on-chocolate pairing is rich, cozy, and perfect for Christmas gatherings.
Coffee or Espresso
The slight bitterness of coffee balances the sweet caramel filling beautifully. Serve these cups after dinner with espresso for a simple holiday dessert.
Fresh Berries
Strawberries, raspberries, or blackberries add a fresh contrast to the rich chocolate and caramel. They also make a dessert platter look brighter.
Vanilla Ice Cream
Place a few caramel cups beside a scoop of vanilla ice cream for an easy plated dessert. The cold ice cream and chewy caramel make a lovely texture combination.
Frequently Asked Questions
Can I make Christmas Chocolate Caramel Cups ahead of time?
Yes, these cups are a great make-ahead Christmas dessert. Prepare them up to 1 week in advance and store them in an airtight container in the refrigerator. Add parchment between layers if you stack them. They taste best when chilled but not rock-hard, so let them sit for 5 minutes before serving.
Can I use homemade caramel instead of caramel candies?
Homemade caramel works well as long as it is thick enough to hold inside the cups. Let it cool before spooning it into the chocolate shells. If it is too hot, it can melt the bottom chocolate layer. For a softer center, use a caramel sauce that firms slightly when chilled.
Why did my chocolate cups crack?
Chocolate can crack if the shell is too thin, if the caramel is very cold when the top layer is added, or if the cups are stored in a very cold freezer and then brought to room temperature quickly. Make the base and sides sturdy enough, chill gently, and avoid sudden temperature changes.
Can I make these with dark chocolate?
Dark chocolate is an excellent choice, especially if you want the cups to taste less sweet. It pairs beautifully with caramel and sea salt. For more chocolate dessert inspiration, you may also enjoy these triple chocolate mousse cups or these chocolate lava cakes.
Can I add other fillings?
Absolutely. You can add a tiny spoonful of peanut butter, chopped pecans, crushed pretzels, or a little marshmallow cream under the caramel. Keep the filling amount small so the chocolate can fully seal the cup. For another caramel dessert idea, try this salted caramel apple pie.
Save This Pin For Later
📌 Save this Christmas Chocolate Caramel Cups recipe to your Pinterest dessert board so you can come back to it when holiday baking season gets busy.
Let me know in the comments how yours turned out. Did you use milk chocolate or dark chocolate? Did you add flaky salt, extra sprinkles, or crushed candy canes on top?
I love hearing how others make these recipes their own. Questions are welcome too, so we can help each other make holiday treats that look beautiful and taste even better. For more daily recipe ideas, follow Meals We Share.
Conclusion
Christmas Chocolate Caramel Cups are simple, festive, and full of the flavors people love most during the holidays. The crisp chocolate shell, soft caramel center, and colorful topping make them feel special without requiring complicated candy-making skills.
Make a batch for your dessert table, tuck them into gift boxes, or keep them chilled for a sweet bite after dinner. They are easy to customize, easy to share, and almost impossible to resist.
Print Christmas Chocolate Caramel Cups
- Total Time: 55 minutes
- Yield: 24 mini cups
- Diet: Vegetarian
Description
These Christmas Chocolate Caramel Cups are a quick holiday dessert that brings together rich chocolate, soft caramel, and festive sprinkles in one easy recipe. Perfect for Christmas parties, dessert trays, edible gifts, holiday food ideas, easy dessert recipes, no-bake treats, and sweet snack ideas, these bite-sized caramel cups are simple to make and beautiful enough to share.
Ingredients
2 cups semi-sweet chocolate chips or chopped semi-sweet chocolate
2 teaspoons coconut oil or shortening
24 soft caramel candies, unwrapped
3 tablespoons heavy cream
1/4 teaspoon fine sea salt
2 tablespoons holiday sprinkles
1 tablespoon coarse sugar or sparkling sugar
24 mini paper candy liners
Instructions
1. Line a mini muffin pan with 24 mini paper candy liners.
2. Add the chocolate and coconut oil to a microwave-safe bowl and microwave in 20-second bursts, stirring between each burst, until smooth.
3. Spoon about 1 teaspoon of melted chocolate into each liner and spread it slightly up the sides to form a shell.
4. Chill the chocolate shells for 10 minutes, or until firm.
5. Add the caramel candies and heavy cream to a small saucepan over low heat and stir until smooth.
6. Remove the caramel from the heat and stir in the fine sea salt. Let it cool for 3 to 5 minutes.
7. Spoon a small amount of caramel into the center of each chocolate shell, leaving room at the top.
8. Chill the filled cups for 10 minutes so the caramel can settle.
9. Spoon the remaining melted chocolate over the caramel and smooth the tops.
10. Add holiday sprinkles and coarse sugar before the chocolate sets.
11. Refrigerate for 20 to 30 minutes, or until firm.
12. Store chilled in an airtight container until ready to serve.
Notes
Use good-quality chocolate for the smoothest shell and best flavor.
Let the caramel cool slightly before filling the cups so it does not melt the bottom chocolate layer.
Keep the cups refrigerated until serving if your kitchen is warm.
- Prep Time: 20 minutes
- Cook Time: 5 minutes
- Category: Dessert
- Method: No-Bake
- Cuisine: American
Nutrition
- Serving Size: 2 mini cups
- Calories: 214
- Sugar: 25g
- Sodium: 86mg
- Fat: 10g
- Saturated Fat: 6g
- Unsaturated Fat: 3g
- Trans Fat: 0g
- Carbohydrates: 32g
- Fiber: 2g
- Protein: 2g
- Cholesterol: 6mg
Keywords: Christmas Chocolate Caramel Cups, holiday dessert, easy dessert recipe, no-bake Christmas treats, chocolate caramel cups, Christmas candy, food ideas