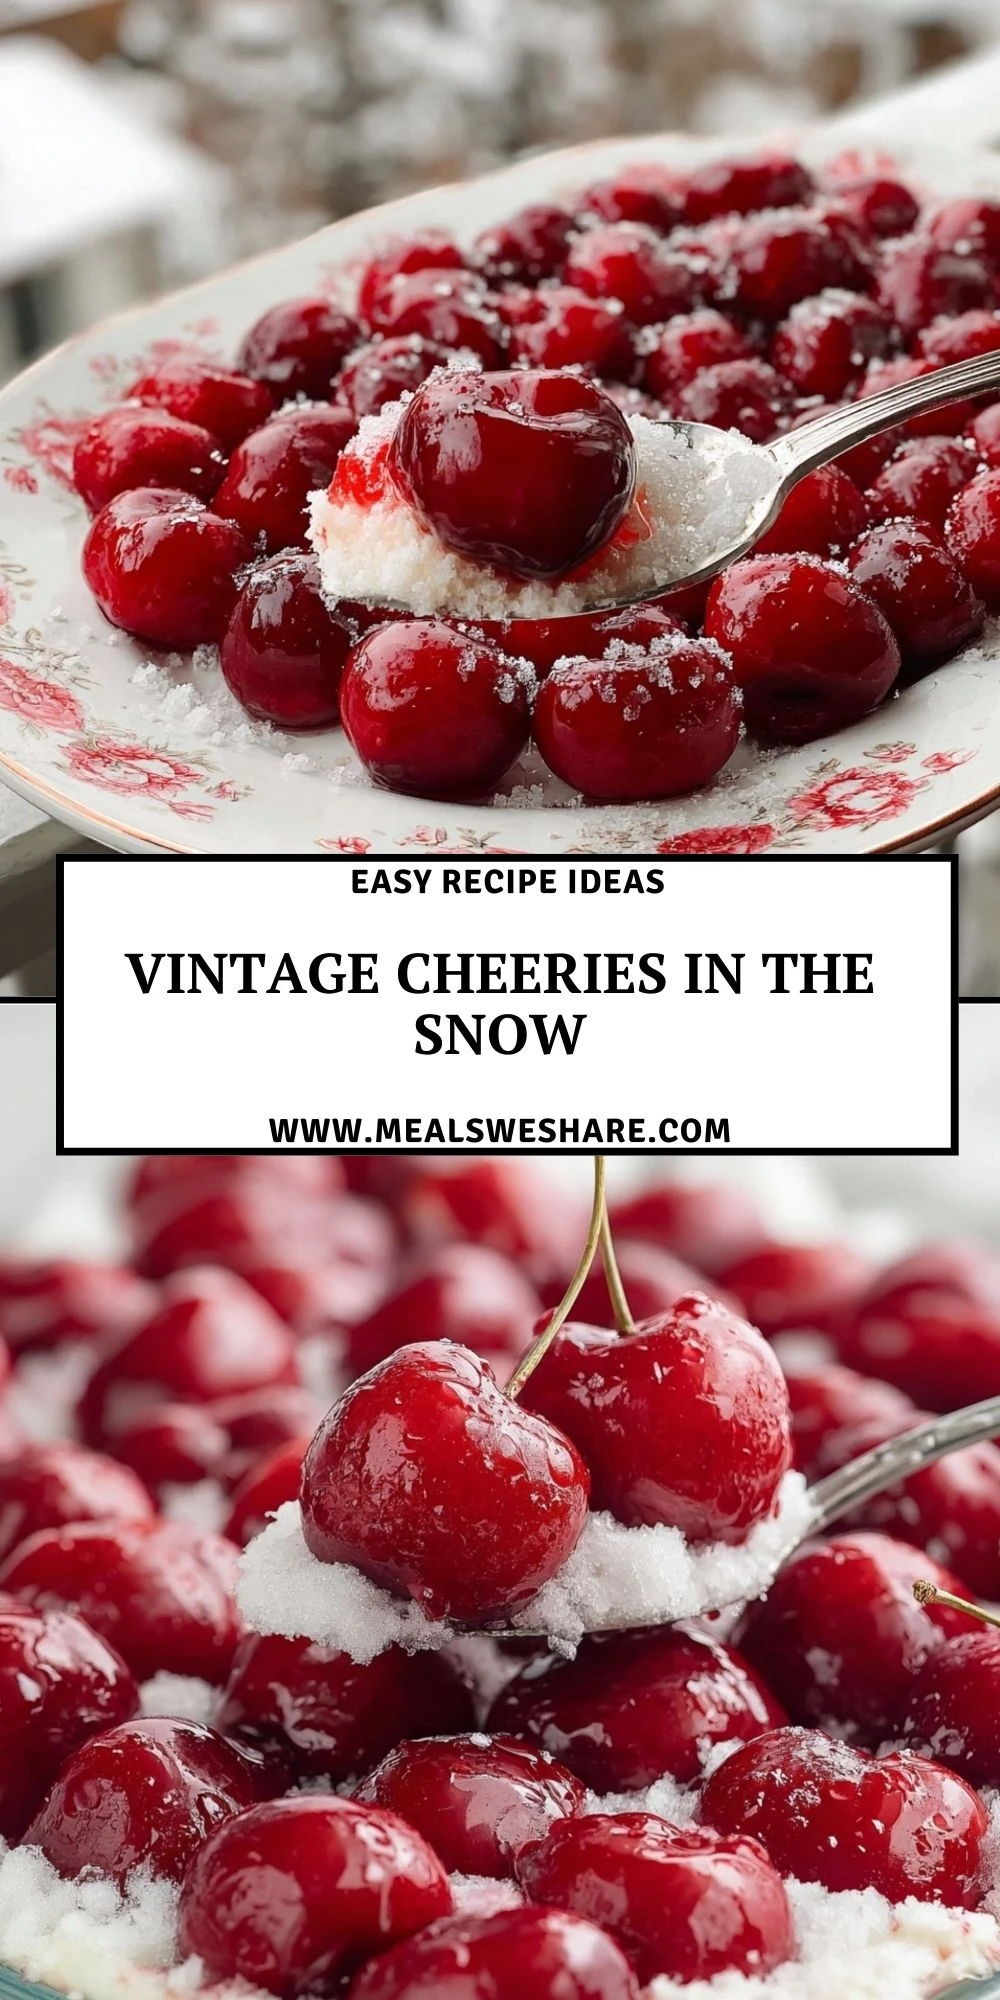
A pan of Vintage Cherries In the Snow looks like something straight off a 1950s dessert table: a golden crumb crust, a fluffy cloud of cream cheese filling, and a glossy blanket of ruby-red cherries on top. It’s retro in the very best way—sweet, simple, and made to share with a crowd.

This no-fuss dessert is perfect for holidays, potlucks, Sunday dinners, or any time you need a make-ahead treat that always gets recipe requests. Every bite has that dreamy mix of crunchy, creamy, and fruity that keeps people going back for “just one more little square.”
Why You’ll Love This Vintage Cherries In the Snow
Vintage Cherries In the Snow is the kind of dessert that makes entertaining feel easy. You can assemble the whole pan hours in advance (or even the day before) and let the fridge do all the work. When it’s time to serve, you simply slice and enjoy—no last-minute baking, frosting, or decorating required.
This recipe also strikes that ideal balance of flavors and textures. The buttery graham cracker crust adds just enough crunch to contrast the smooth, tangy cream cheese layer. On top, a generous layer of cherry pie filling brings bright fruitiness and a gorgeous pop of color. It tastes like a cross between a cheesecake and a trifle, but with a fraction of the effort.
Because it’s made in a 9×13-inch pan, it’s budget-friendly and perfect for feeding a crowd. You can easily tweak the flavors with different fruit toppings or add-ins, but the classic cherry version is a nostalgic favorite that never goes out of style.
What Kind of Cherry Filling Works Best for Cherries In the Snow?
For that familiar vintage flavor and jewel-like topping, canned cherry pie filling is the easiest and most reliable choice. It’s already thickened and sweetened, so you can spoon it right over the cream cheese layer without any extra cooking or guesswork.
If you prefer a slightly tarter finish, look for a cherry pie filling labeled “more fruit” or “less sugar,” or stir in a handful of fresh or frozen tart cherries. You can also brighten the flavor by adding a splash of lemon juice or a pinch of almond extract to the pie filling before spreading it over the dessert.
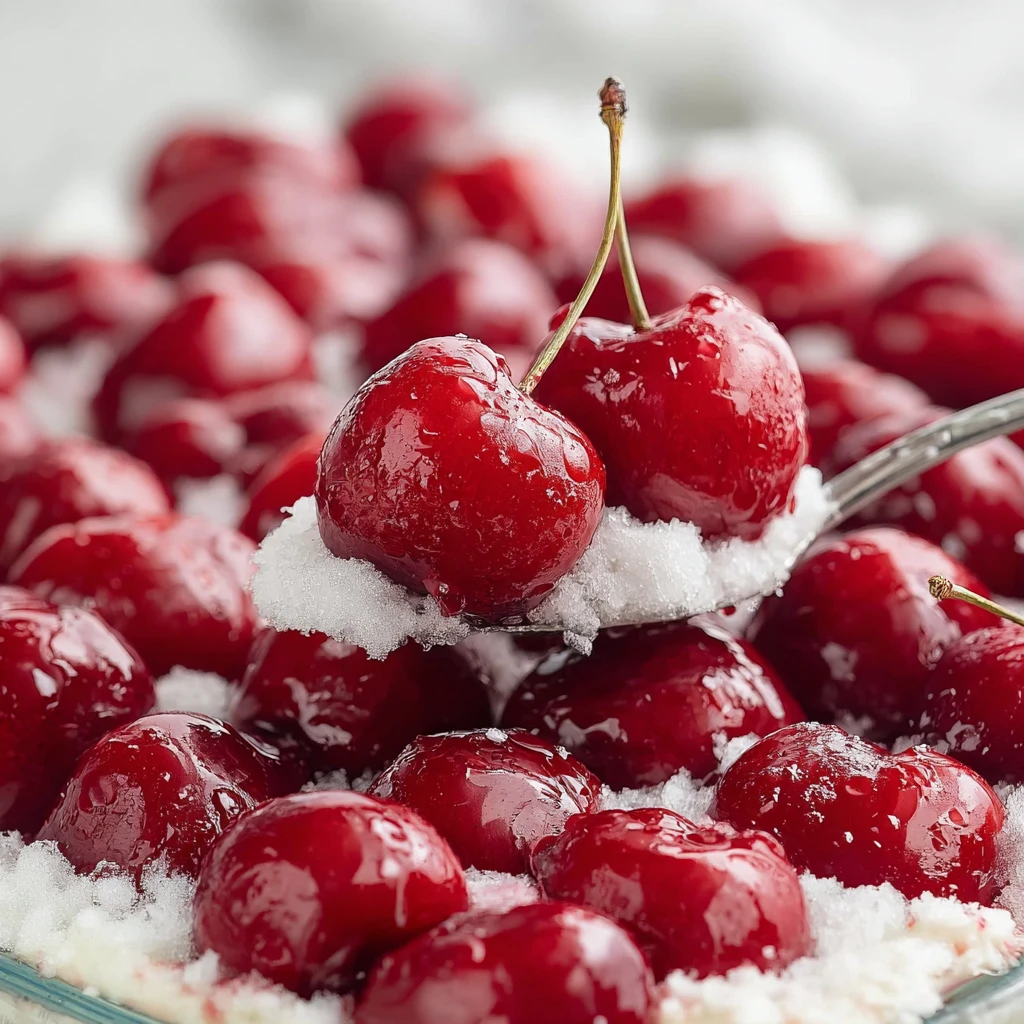
Homemade cherry topping works beautifully too—just make sure it cools completely and is thick enough to sit on top of the creamy layer without sinking in. However you choose to top it, the cherry layer is what gives this dessert its snowy-scarlet look and classic charm.
Ingredients for the Vintage Cherries In the Snow

This dessert uses simple pantry and fridge staples, which is part of why it’s stayed popular for generations. Each component plays a specific role in getting that perfect layered bite.
- Graham cracker crumbs – Form the buttery, slightly sweet base that holds everything together and adds a bit of crunch.
- Granulated sugar – Sweetens the crust just enough and helps it set more firmly when chilled.
- Unsalted butter – Binds the graham cracker crumbs into a cohesive crust and adds rich flavor.
- Cream cheese – Creates the tangy, creamy “snow” layer that balances the sweetness of the cherries.
- Powdered sugar – Sweetens the cream cheese mixture while keeping it silky smooth without any grittiness.
- Vanilla extract – Adds warm, bakery-style flavor to the creamy layer.
- Heavy whipping cream or whipped topping – Lightens the cream cheese into a fluffy, mousse-like filling.
- Cherry pie filling – Provides the glossy, fruit-forward topping that makes this dessert so eye-catching and delicious.
- Optional toasted coconut or sliced almonds – Sprinkled on top for a little crunch and extra vintage flair, if you like.
How To Make the Vintage Cherries In the Snow
This is a wonderfully forgiving dessert, even if you don’t bake often. You’ll build it in three simple layers: crust, cream, and cherries. Give it plenty of time to chill so the layers firm up and slice cleanly.
Step 1 – Prepare the Pan
Lightly grease a 9×13-inch baking dish or mist it with nonstick spray. If you want easier serving later, you can line the bottom with a sheet of parchment paper, leaving a bit of overhang on the sides to help lift out neat squares.
Step 2 – Make the Buttery Graham Cracker Crust
In a mixing bowl, combine the graham cracker crumbs, granulated sugar, and melted butter until the mixture looks like damp sand and holds together when pressed. Pour the mixture into the prepared pan and press it firmly into an even layer using the bottom of a measuring cup or glass.
For a slightly firmer crust, you can bake it at 350°F (175°C) for about 8–10 minutes, then let it cool completely. If you prefer a true no-bake dessert, simply chill the pressed crust in the fridge for at least 20 minutes while you prepare the filling.
Step 3 – Whip the Fluffy Cream Cheese Layer
Beat the softened cream cheese with the powdered sugar and vanilla until completely smooth and lump-free. In a separate bowl, whip the cold heavy cream to stiff peaks (or measure out thawed whipped topping). Gently fold the whipped cream into the cream cheese mixture until it’s light and airy.
Spread this creamy mixture over the cooled or well-chilled crust, smoothing the top with an offset spatula or the back of a spoon. Make sure the layer reaches all the edges so the cherry topping doesn’t sneak down the sides.
Step 4 – Add the Cherry Topping
Stir the cherry pie filling to loosen it, then spoon it carefully over the cream layer. Spread gently so you don’t disturb the creamy “snow” underneath. If you’re adding toasted coconut or sliced almonds, sprinkle them over the cherries now.
Step 5 – Chill and Serve
Cover the pan and refrigerate for at least 4 hours, or overnight for the cleanest slices. When you’re ready to serve, cut into squares and use a spatula to lift out each piece, making sure to scoop up all three layers. Enjoy straight from the fridge for the best texture.
Serving and Storing Vintage Cherries In the Snow
A full 9×13-inch pan of Vintage Cherries In the Snow comfortably serves about 12 people, making it ideal for holidays, potlucks, or big family dinners. You can cut smaller squares to stretch it further for a dessert buffet, or generous rectangles if it’s the star of the show.
Serve the dessert well chilled so the layers stay distinct and the slices hold their shape. The creamy middle softens as it sits at room temperature, so only pull out as much as you plan to serve within about 30 minutes.
Leftovers keep beautifully. Cover the pan tightly with plastic wrap or transfer pieces to an airtight container and refrigerate for up to 4 days. The crust will soften a bit over time, but the flavors meld and the dessert tastes even more luscious by day two.
Because of the creamy filling and graham crust, this dessert does not freeze well—the texture of the dairy layer can become grainy once thawed. For best results, store it in the fridge and enjoy within a few days of making.
What to Serve With Vintage Cherries In the Snow?
1. Hot Coffee or Espresso
The tart-sweet cherries and creamy filling pair wonderfully with a strong cup of coffee or a shot of espresso. The bitterness of the coffee cuts through the richness and makes each bite taste even more decadent.
2. Vanilla or Almond Ice Cream
If you want to turn this into an extra-indulgent dessert plate, serve a cold square alongside a scoop of vanilla or almond ice cream. The extra creaminess echoes the cheesecake layer and makes the whole dessert feel restaurant-worthy.
3. Light, Fresh Fruit
Balance the sweetness with a bowl of fresh berries or sliced citrus. The bright, juicy fruit is a refreshing contrast and keeps the dessert course from feeling too heavy.
4. Savory Main Dishes
Vintage Cherries In the Snow is a great follow-up to hearty, comforting mains like baked casseroles, roasted chicken, or grilled steak. Its cool, fruity finish is a lovely way to end a rich meal.
Frequently Asked Questions
Can I make Vintage Cherries In the Snow ahead of time?
Yes—this dessert is actually better when made ahead. The layers need time to chill and set so you get clean slices and a mellow, well-blended flavor. You can assemble the entire pan up to 24 hours in advance and keep it covered in the refrigerator until serving.
Can I use a different fruit topping instead of cherries?
Absolutely. Blueberry, strawberry, or mixed berry pie filling all work beautifully in this recipe. If you love berry desserts, you might also enjoy serving this alongside a slice of your favorite triple berry cheesecake from your dessert rotation, or use a mixed berry pie filling for a fun twist.
Can I make this dessert in individual cups?
Yes, Vintage Cherries In the Snow is easy to turn into single-serve treats. Layer the crust, cream, and cherries in small jars or dessert cups instead of a big pan. It’s a great approach if you already love no bake mini cheesecakes and want something similarly cute and portable for parties.
How do I keep the layers from mixing together?
Make sure each layer is properly chilled and set before adding the next. Let the crust cool completely if you baked it, and spread the cream cheese layer gently without pressing too hard. When adding the cherry topping, drop it on by spoonfuls and then lightly spread it rather than dragging it across the cream layer. Plenty of chill time in the fridge also helps the layers stay distinct.
What can I serve if someone prefers a warm fruit dessert?
For guests who love their fruit desserts warm and cozy, offer a small dish of something baked and bubbly on the side—think a classic blackberry cobbler or another warm fruit crumble—along with a chilled square of Cherries In the Snow. That way everyone gets the style of dessert they like best.
Save This Pin For Later
📌 Save this Vintage Cherries In the Snow dessert to your Pinterest board so you can come back to it any time.
And let me know in the comments how yours turned out. Did you keep it classic with cherry pie filling, or try another fruit on top? Did you add toasted coconut or nuts for extra crunch?
I love hearing how others make these vintage desserts their own. Questions are always welcome too—let’s help each other bake smarter and share more sweet memories.
Conclusion
Vintage Cherries In the Snow is one of those timeless, crowd-pleasing desserts that feels special but is secretly so simple to make. With its buttery crust, fluffy cream cheese layer, and bright cherry topping, it’s perfect for holidays, church suppers, or any night you want an easy, no-bake treat that feeds a crowd.
If this retro cherry dessert wins a spot in your regular rotation, be sure to explore even more sweet inspiration from Meals We Share on Pinterest—there you’ll find plenty of other easy desserts, no-bake ideas, and party-ready treats to round out your menu.
Vintage Cherries In the Snow
- Total Time: 240
- Yield: 12 servings
- Diet: Vegetarian
Description
Vintage Cherries In the Snow is an easy no bake dessert with a buttery graham cracker crust, fluffy cream cheese “snow” layer, and a glossy cherry pie filling on top—perfect for quick breakfast or brunch treats, make-ahead dessert, or simple sweet food ideas when you need an easy recipe that feeds a crowd. This light yet decadent layered dessert is ideal for easy dinner party dessert, holiday gatherings, or everyday breakfast ideas when you want something creamy, fruity, and delightfully nostalgic.
Ingredients
2 cups graham cracker crumbs
1/4 cup granulated sugar
1/2 cup unsalted butter melted
16 ounces cream cheese softened
1 cup powdered sugar
2 teaspoons vanilla extract
1 1/2 cups heavy whipping cream cold
2 cans cherry pie filling 21 ounces each
1/4 cup toasted coconut or sliced almonds optional garnish
Instructions
1. Lightly grease a 9×13 inch baking dish or line the bottom with parchment paper, leaving some overhang for easy lifting later.
2. In a medium bowl, combine graham cracker crumbs, granulated sugar, and melted butter until the mixture resembles damp sand and holds together when pressed.
3. Press the crumb mixture firmly and evenly into the bottom of the prepared pan using the bottom of a measuring cup or glass. Chill while you prepare the filling, or bake at 350°F (175°C) for 8–10 minutes for a firmer crust, then cool completely.
4. In a large mixing bowl, beat softened cream cheese with powdered sugar and vanilla extract until completely smooth and creamy, scraping down the sides as needed.
5. In a separate bowl, whip the cold heavy cream to stiff peaks using a hand mixer or stand mixer.
6. Gently fold the whipped cream into the cream cheese mixture in two or three additions until light and fluffy, taking care not to deflate the cream.
7. Spread the cream cheese mixture evenly over the cooled or well-chilled crust, smoothing the top all the way to the edges.
8. Stir the cherry pie filling to loosen it, then spoon it carefully over the cream layer, spreading gently so you don’t disturb the layer underneath.
9. If using toasted coconut or sliced almonds, sprinkle them evenly over the cherry layer for added crunch and flavor.
10. Cover the pan tightly and refrigerate for at least 4 hours, or overnight, until fully chilled and set.
11. When ready to serve, slice into squares and lift out with a spatula, making sure to scoop up all three layers in each piece.
Notes
For the cleanest slices, chill the dessert overnight so the creamy layer has plenty of time to firm up before cutting.
To lighten the dessert further, you can substitute whipped topping for the whipped cream; just fold it in gently so the filling stays airy.
Swap the cherry pie filling for blueberry, strawberry, or mixed berry pie filling to create your own favorite flavor variation while keeping the same easy base recipe.
- Prep Time: 20
- Category: Dessert
- Method: No Bake
- Cuisine: American
Nutrition
- Serving Size: 1 square
- Calories: 320
- Sugar: 28
- Sodium: 220
- Fat: 18
- Saturated Fat: 11
- Unsaturated Fat: 6
- Trans Fat: 0
- Carbohydrates: 37
- Fiber: 1
- Protein: 4
- Cholesterol: 55
Keywords: vintage dessert, cherries in the snow, no bake cherry dessert, layered dessert, holiday dessert, easy recipe